Single Sign-On (SSO)
Single Sign-On (SSO) simplifies user access across a multitude of trusted application systems within a diverse environment. By logging in just once and configuring settings through the management backend, users enjoy the convenience of seamlessly accessing scena.ai via SSO authentication.
Step-by-Step Tutorial for Azure Integration
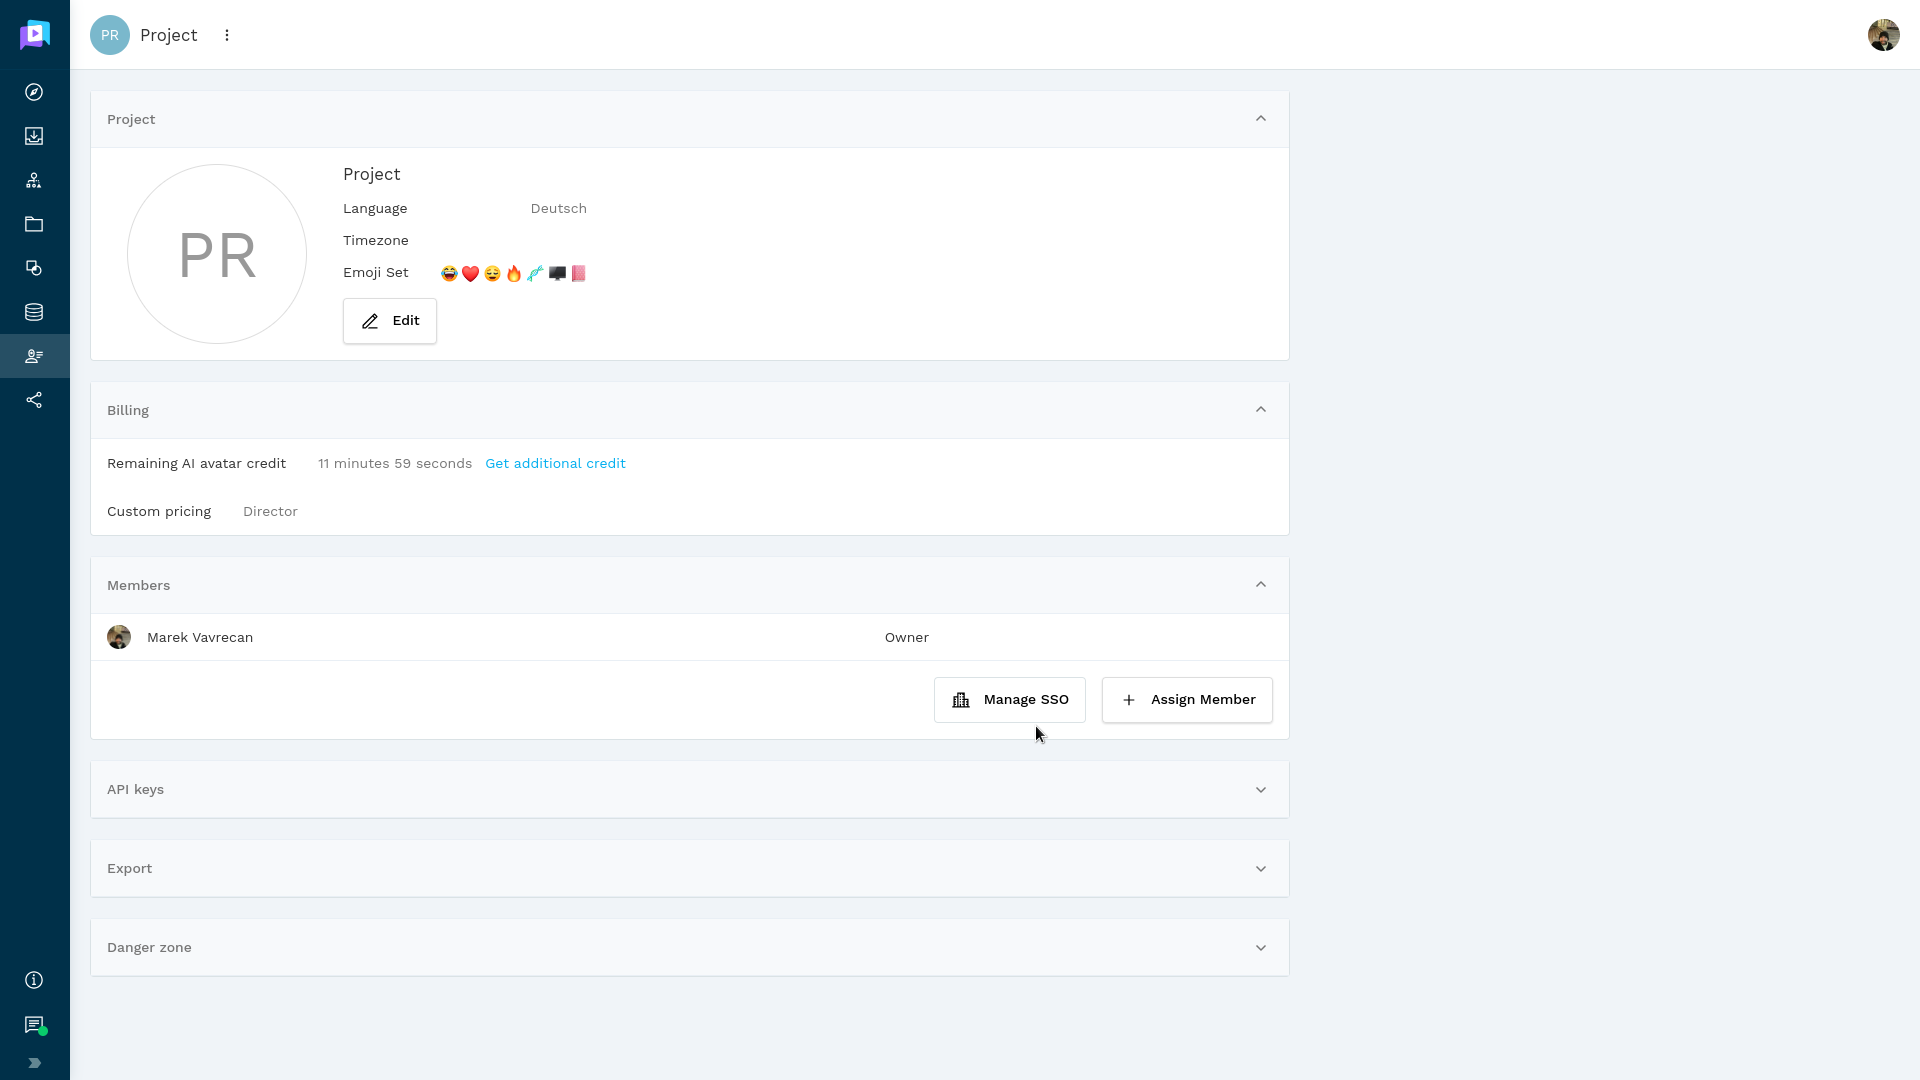
- Navigate to Project Settings Page via the main menu. Click on the Manage SSO.
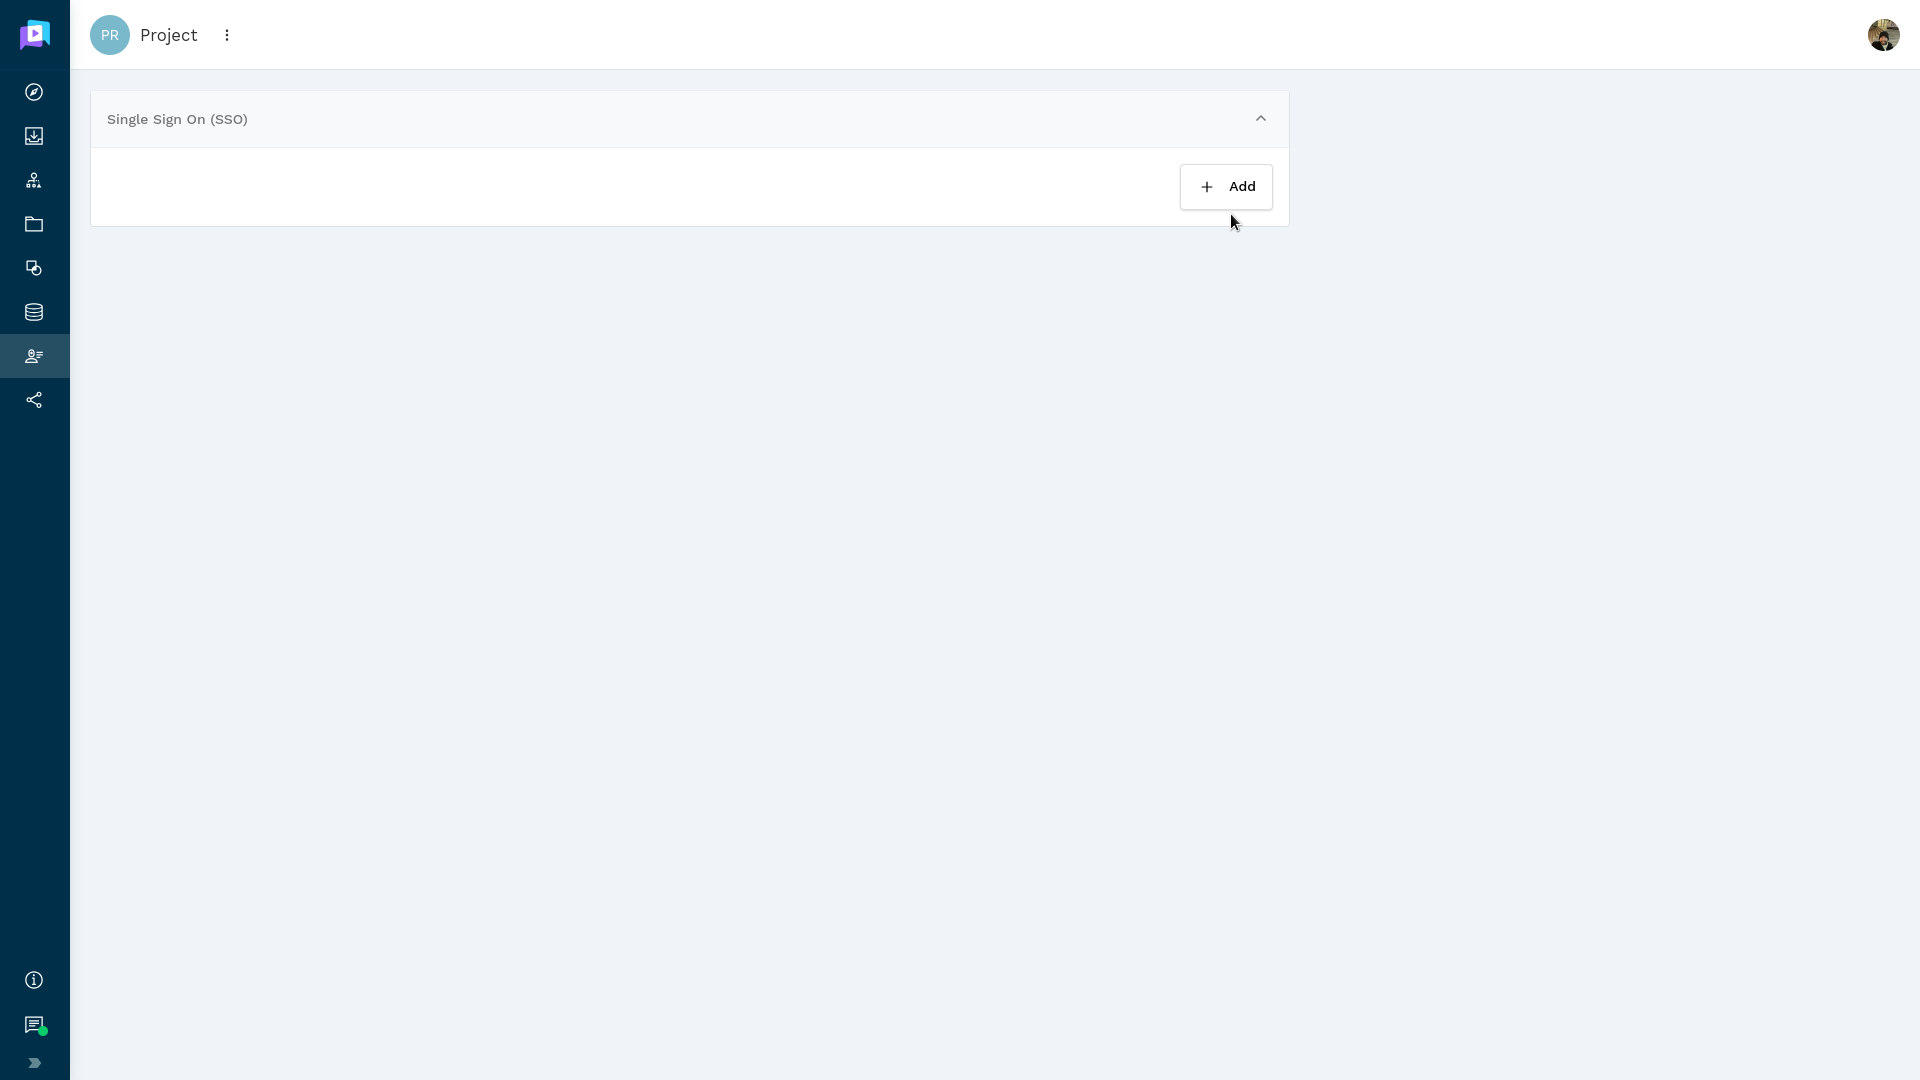
- Add new SSO provider by clicking on Add.
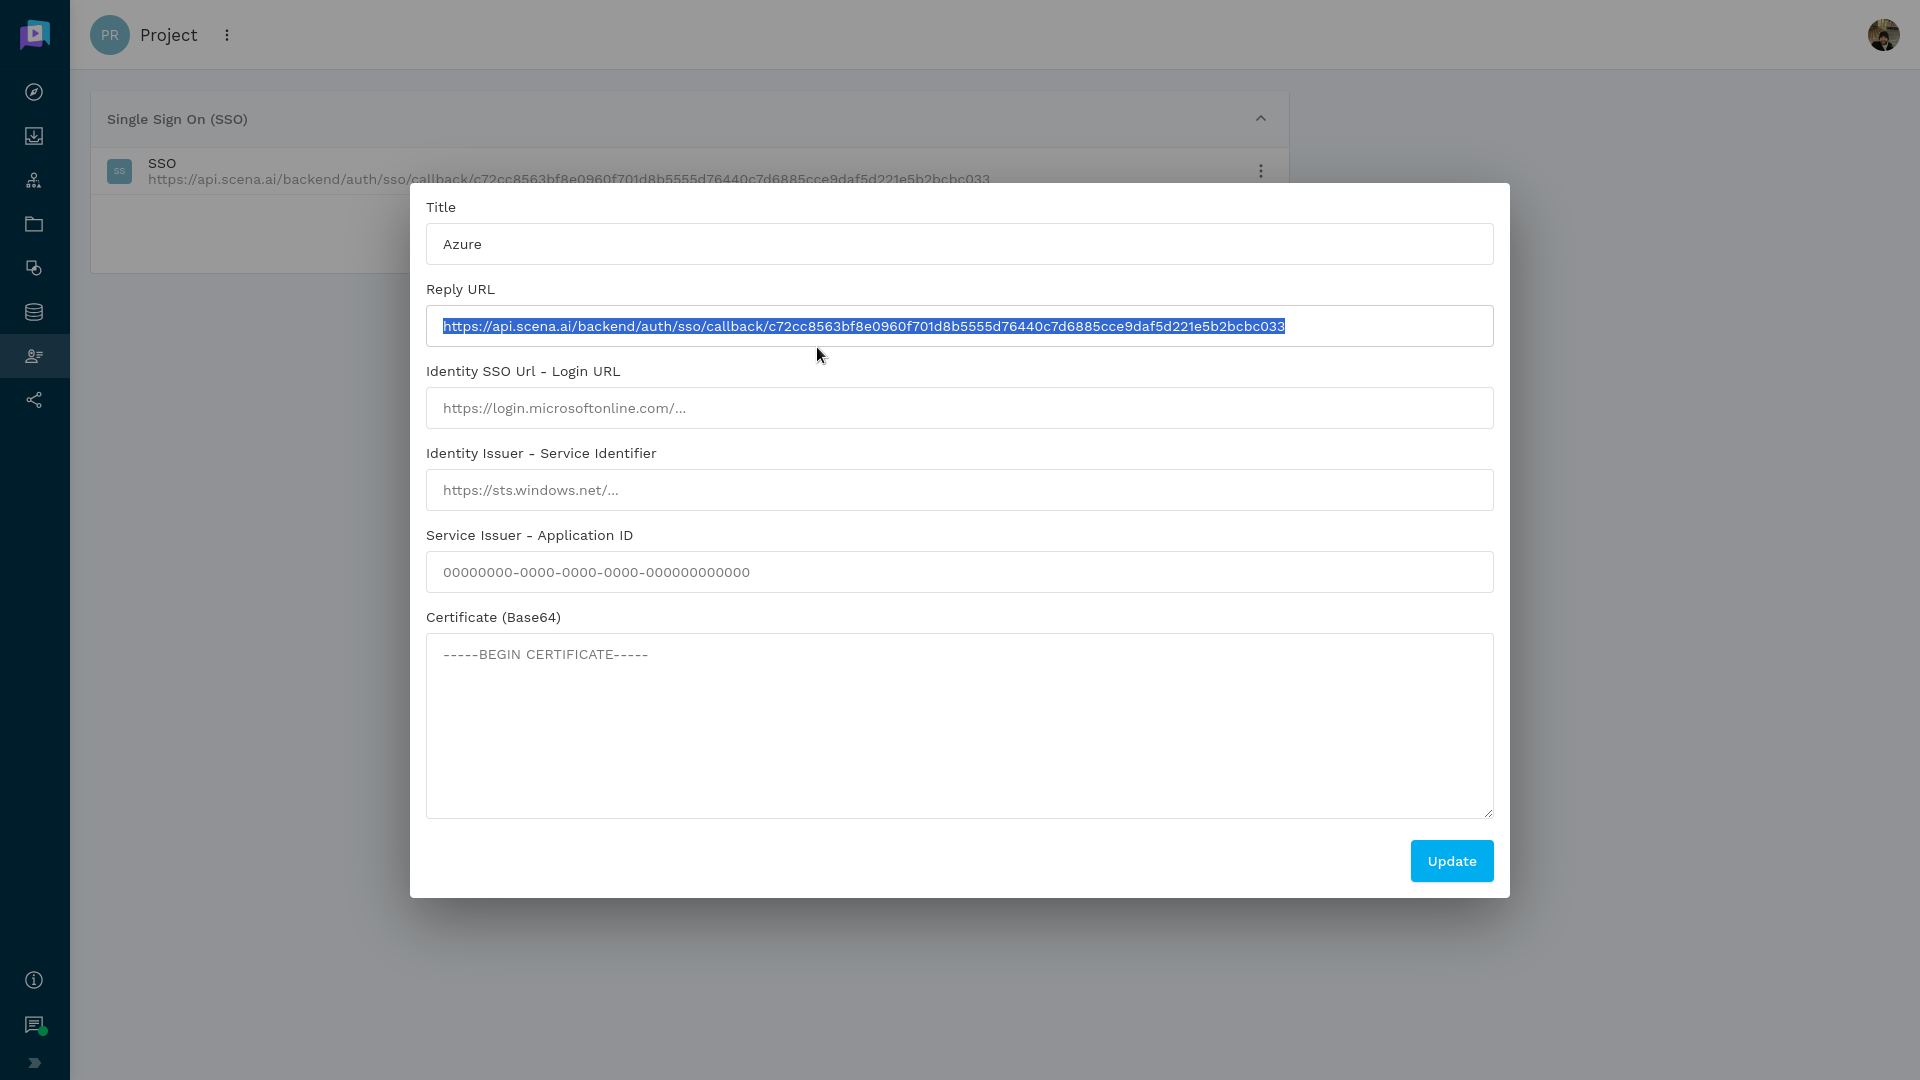
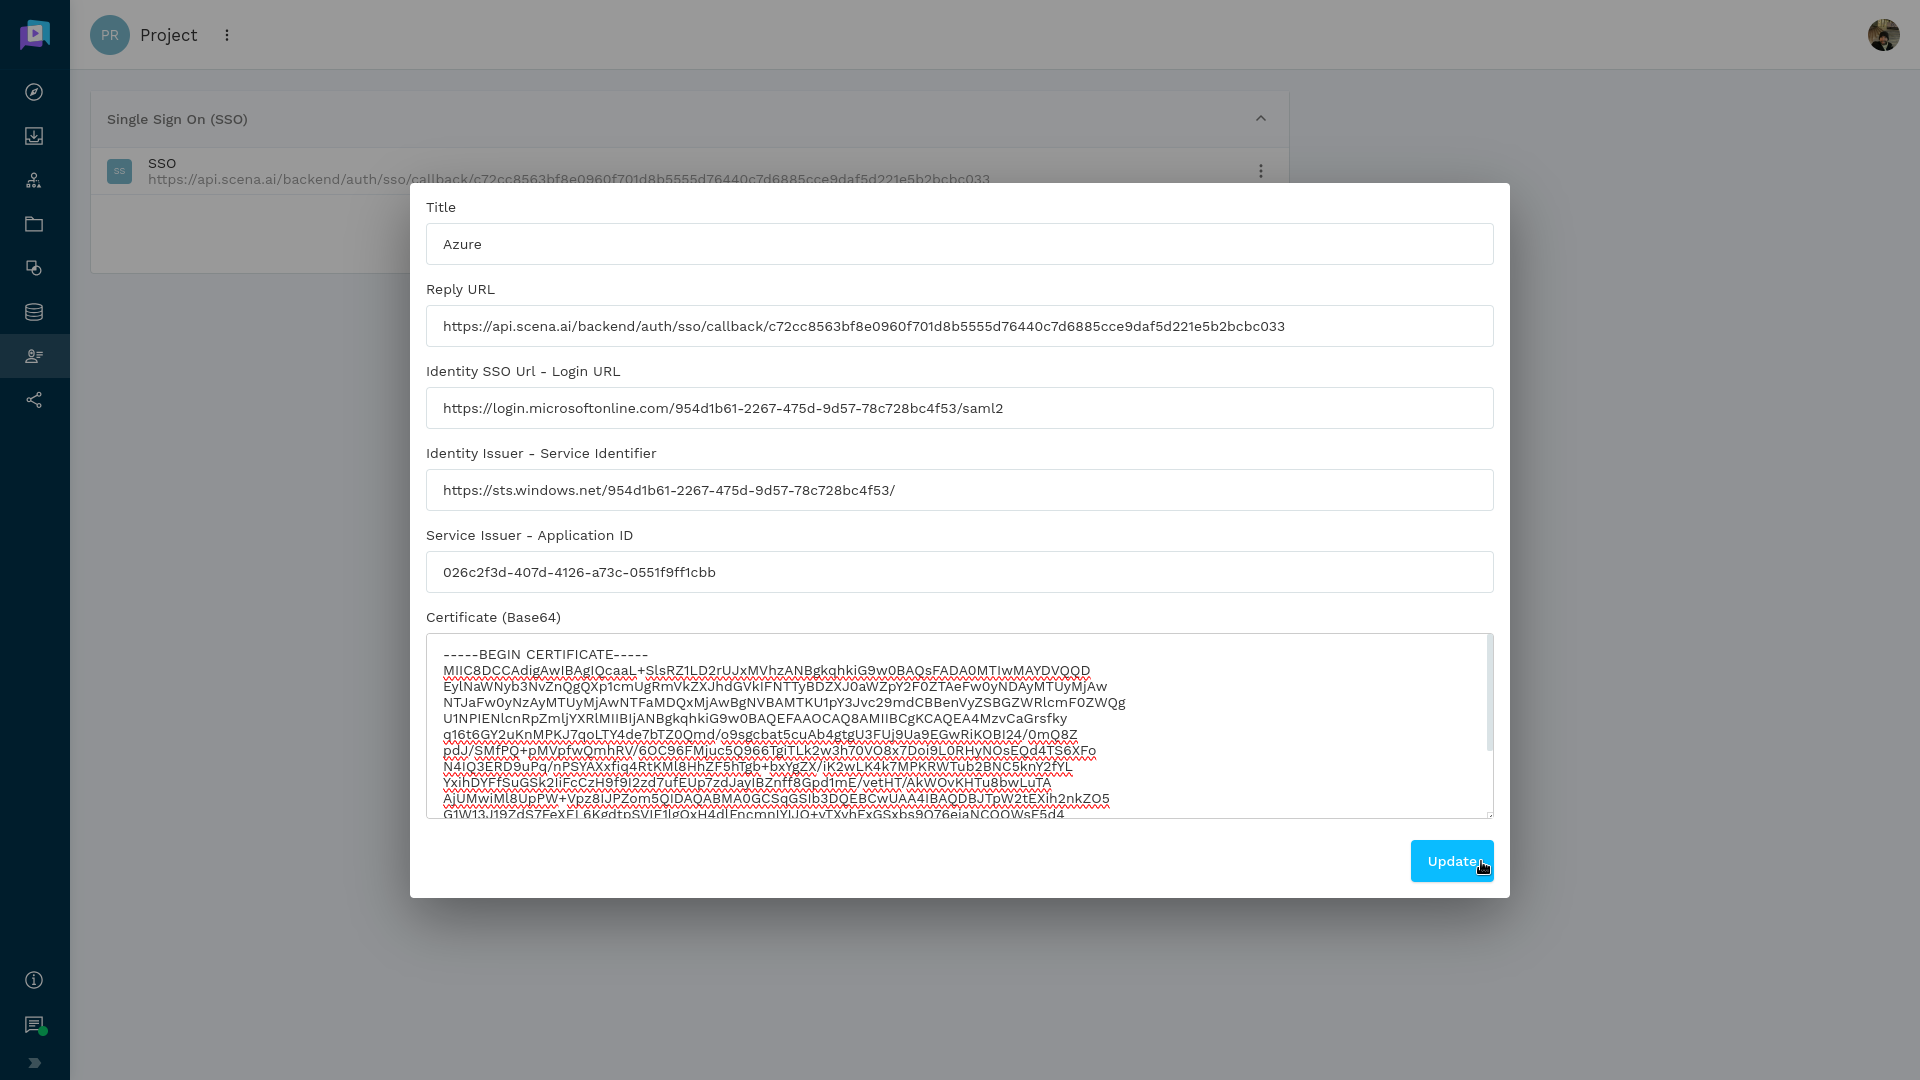
- Set Title and copy Reply URL.
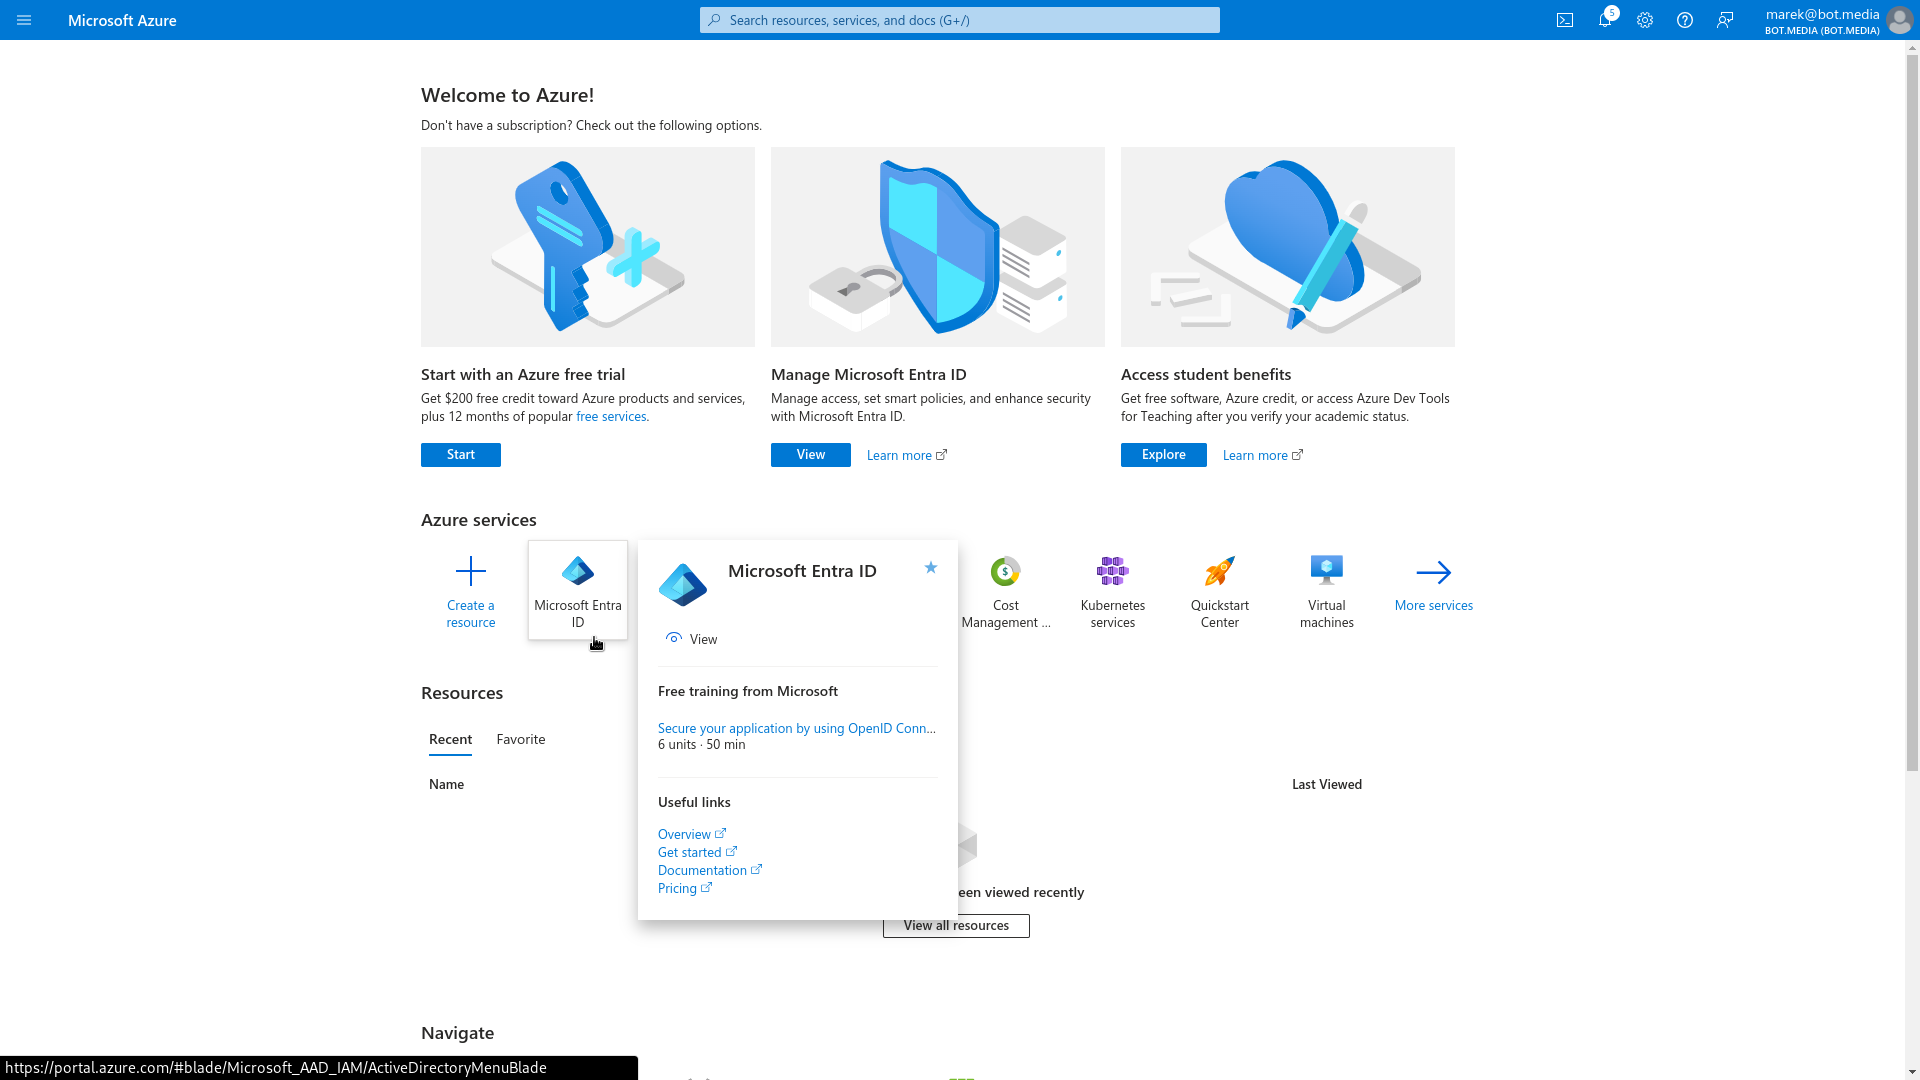
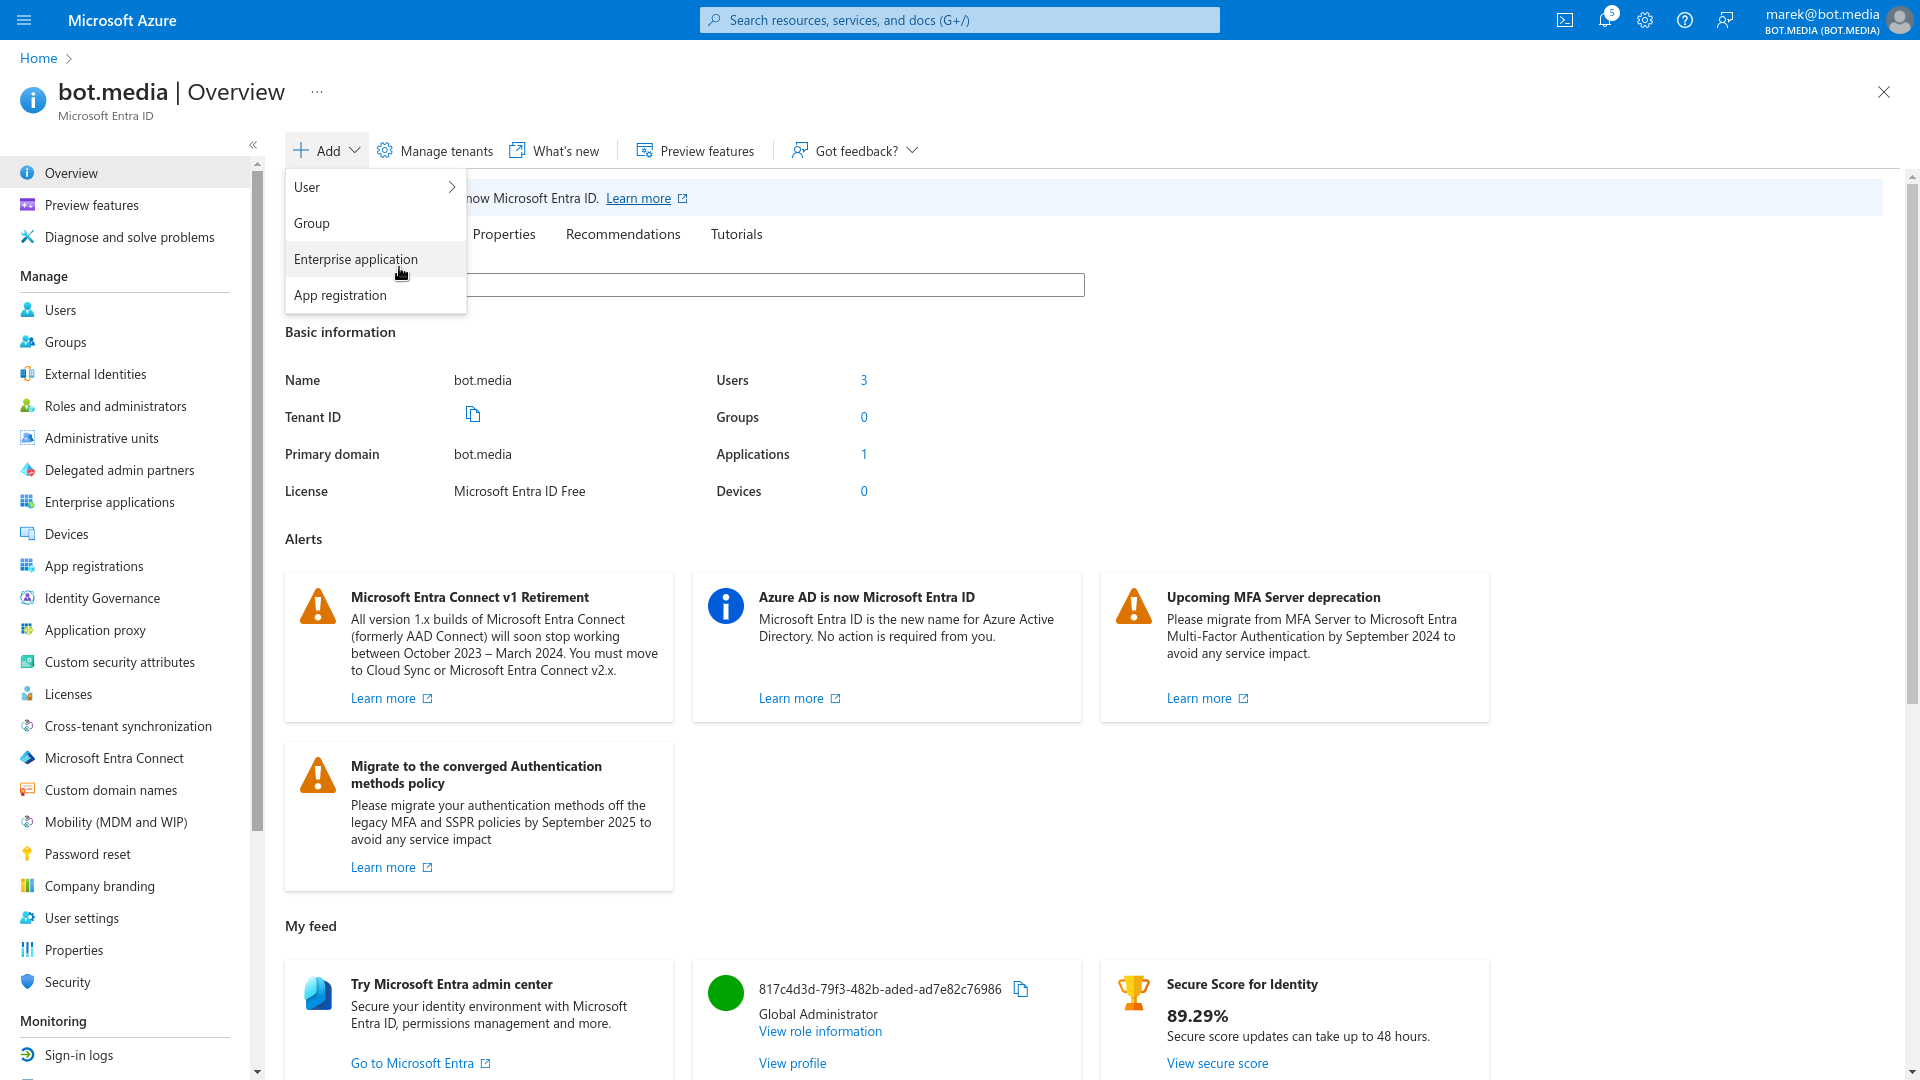
- Open Azure and select Microsoft Entra ID service.
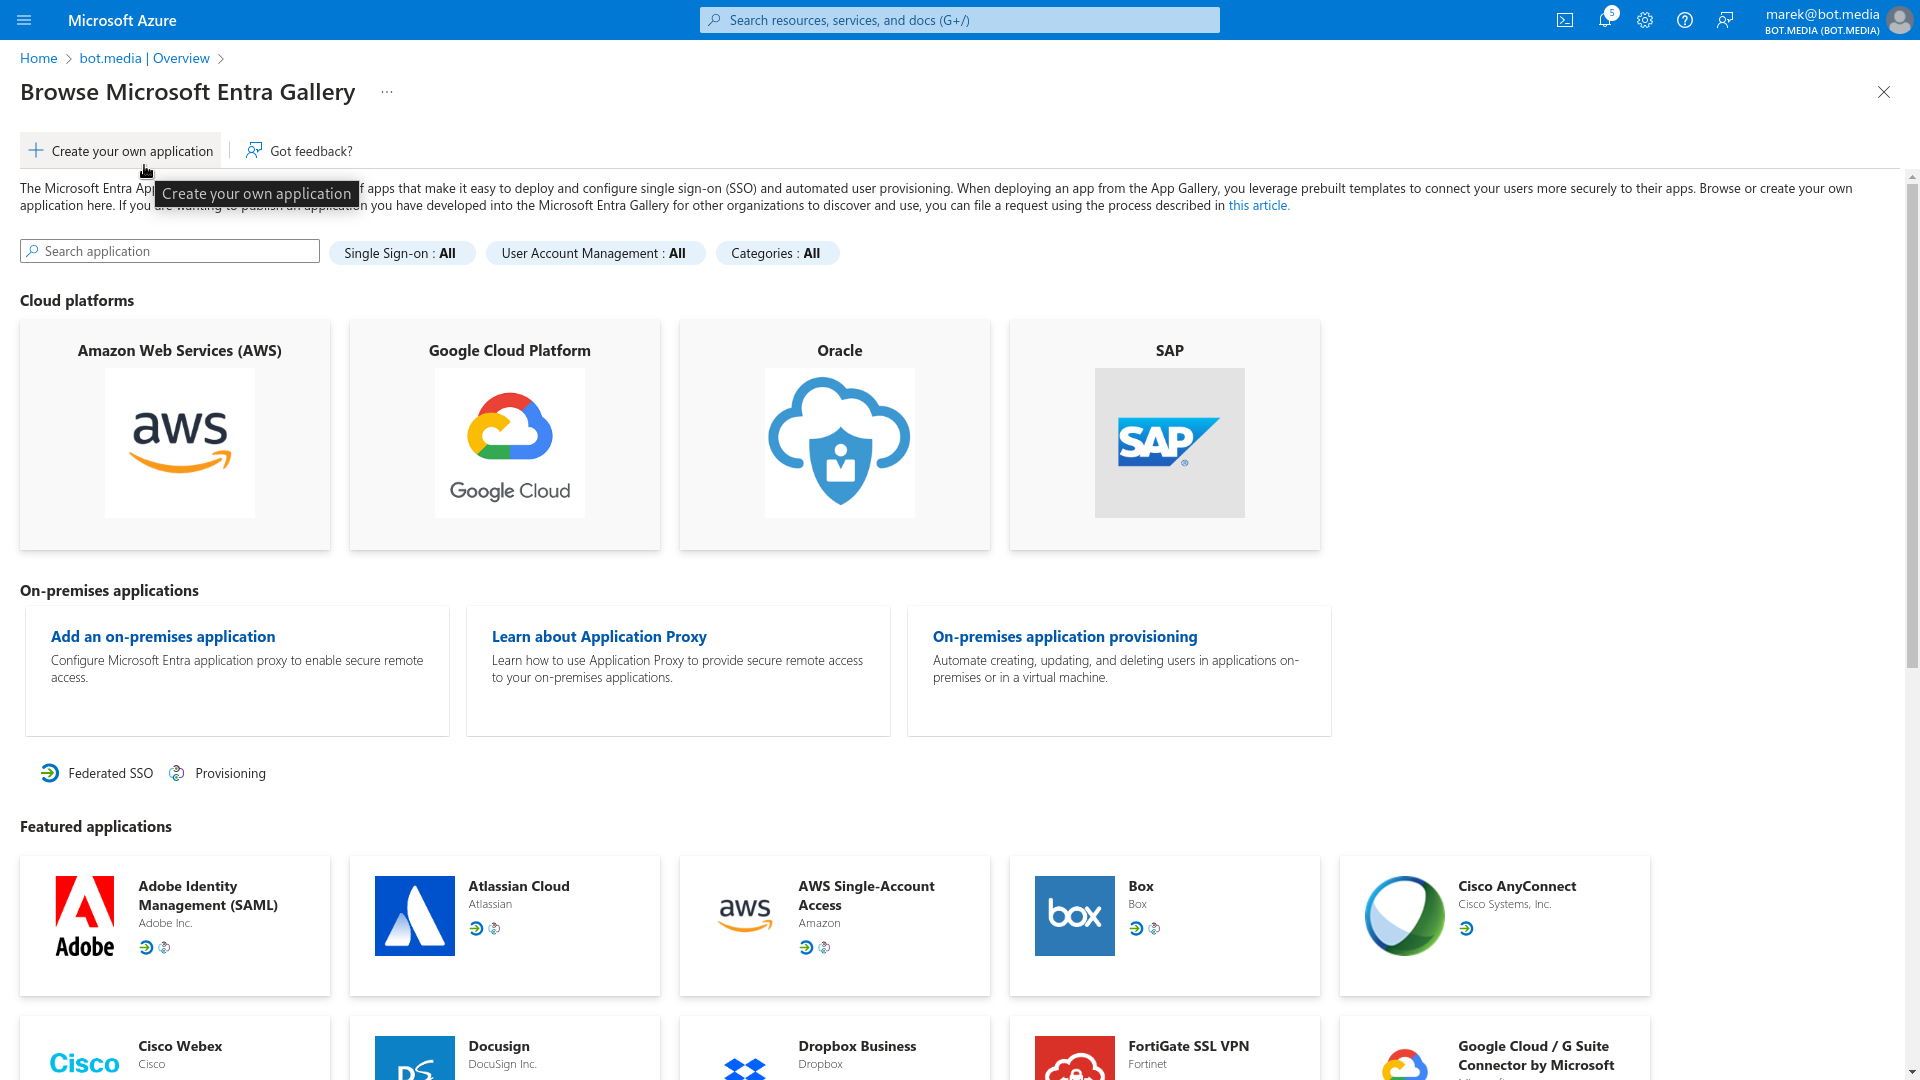
- Click on Add and add new Enterprise application.
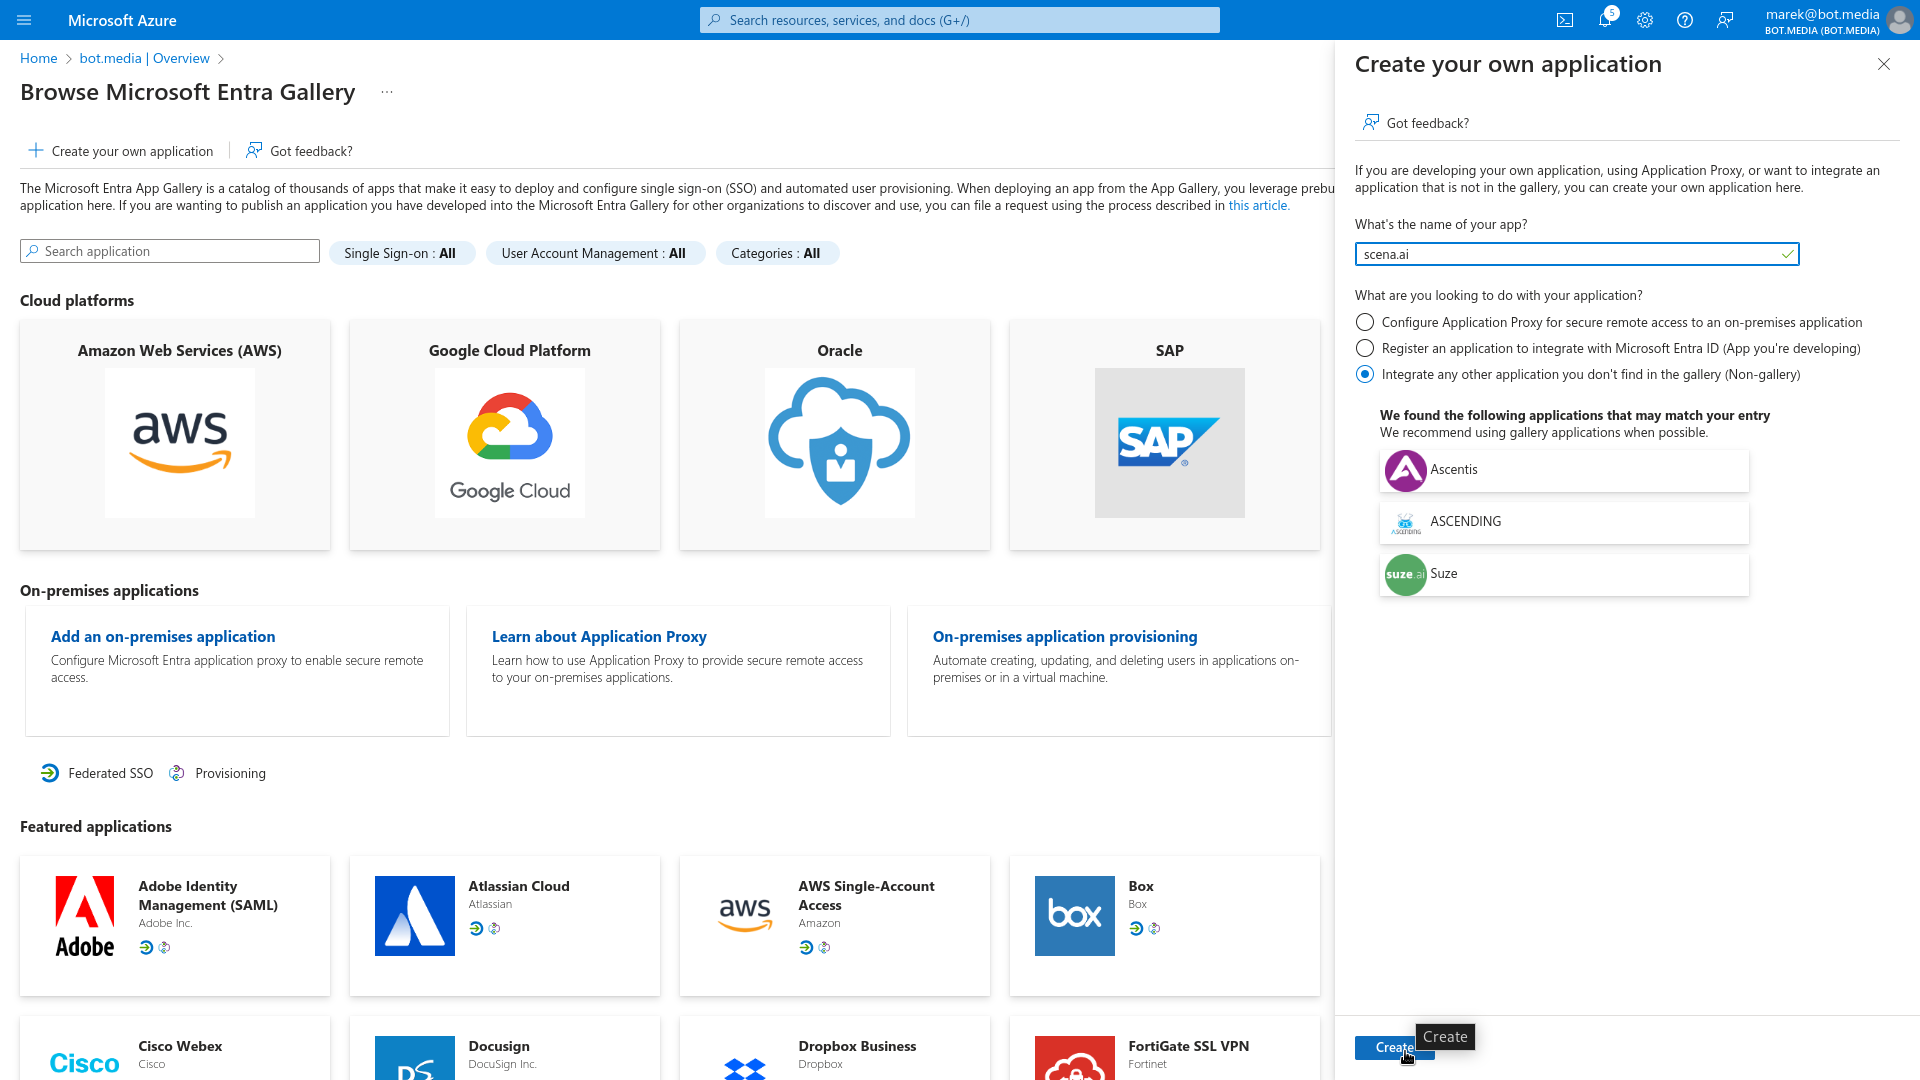
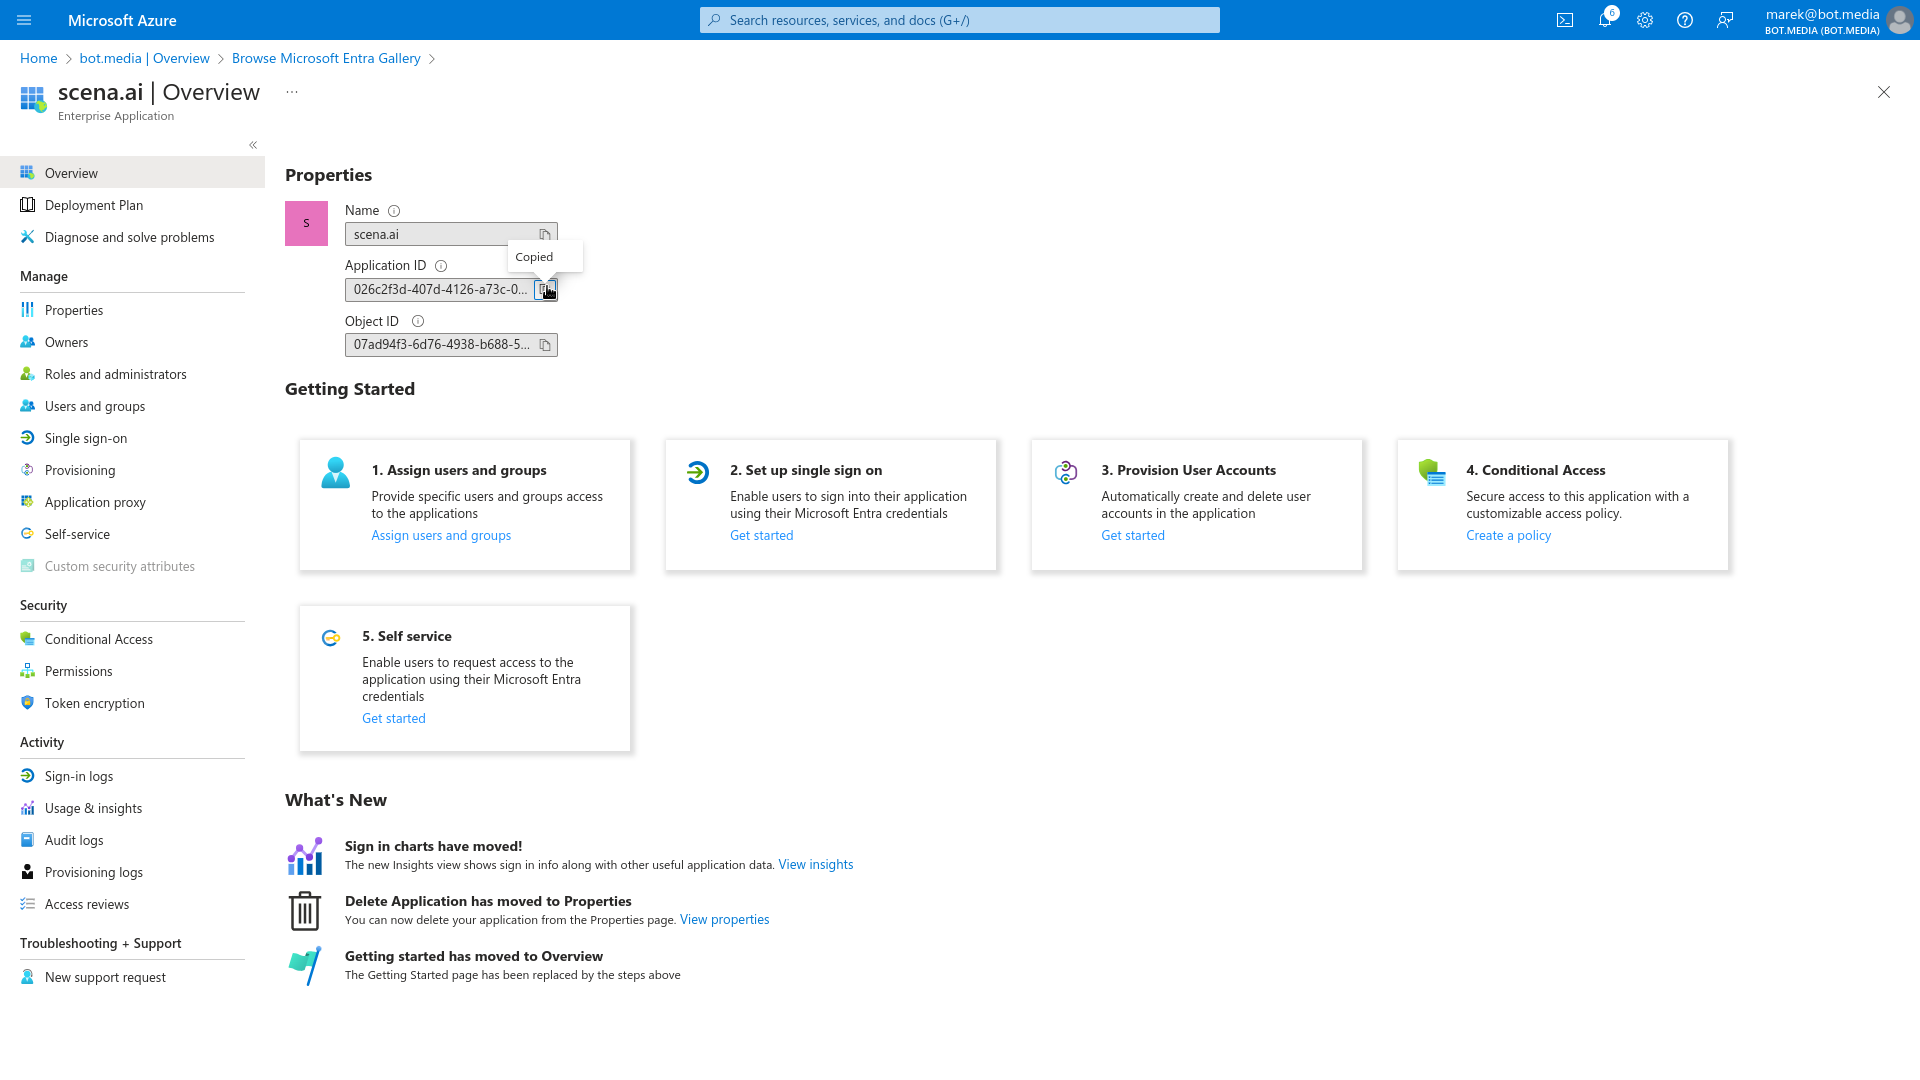
- Copy Application ID and save it to the scena.ai SSO configuration.
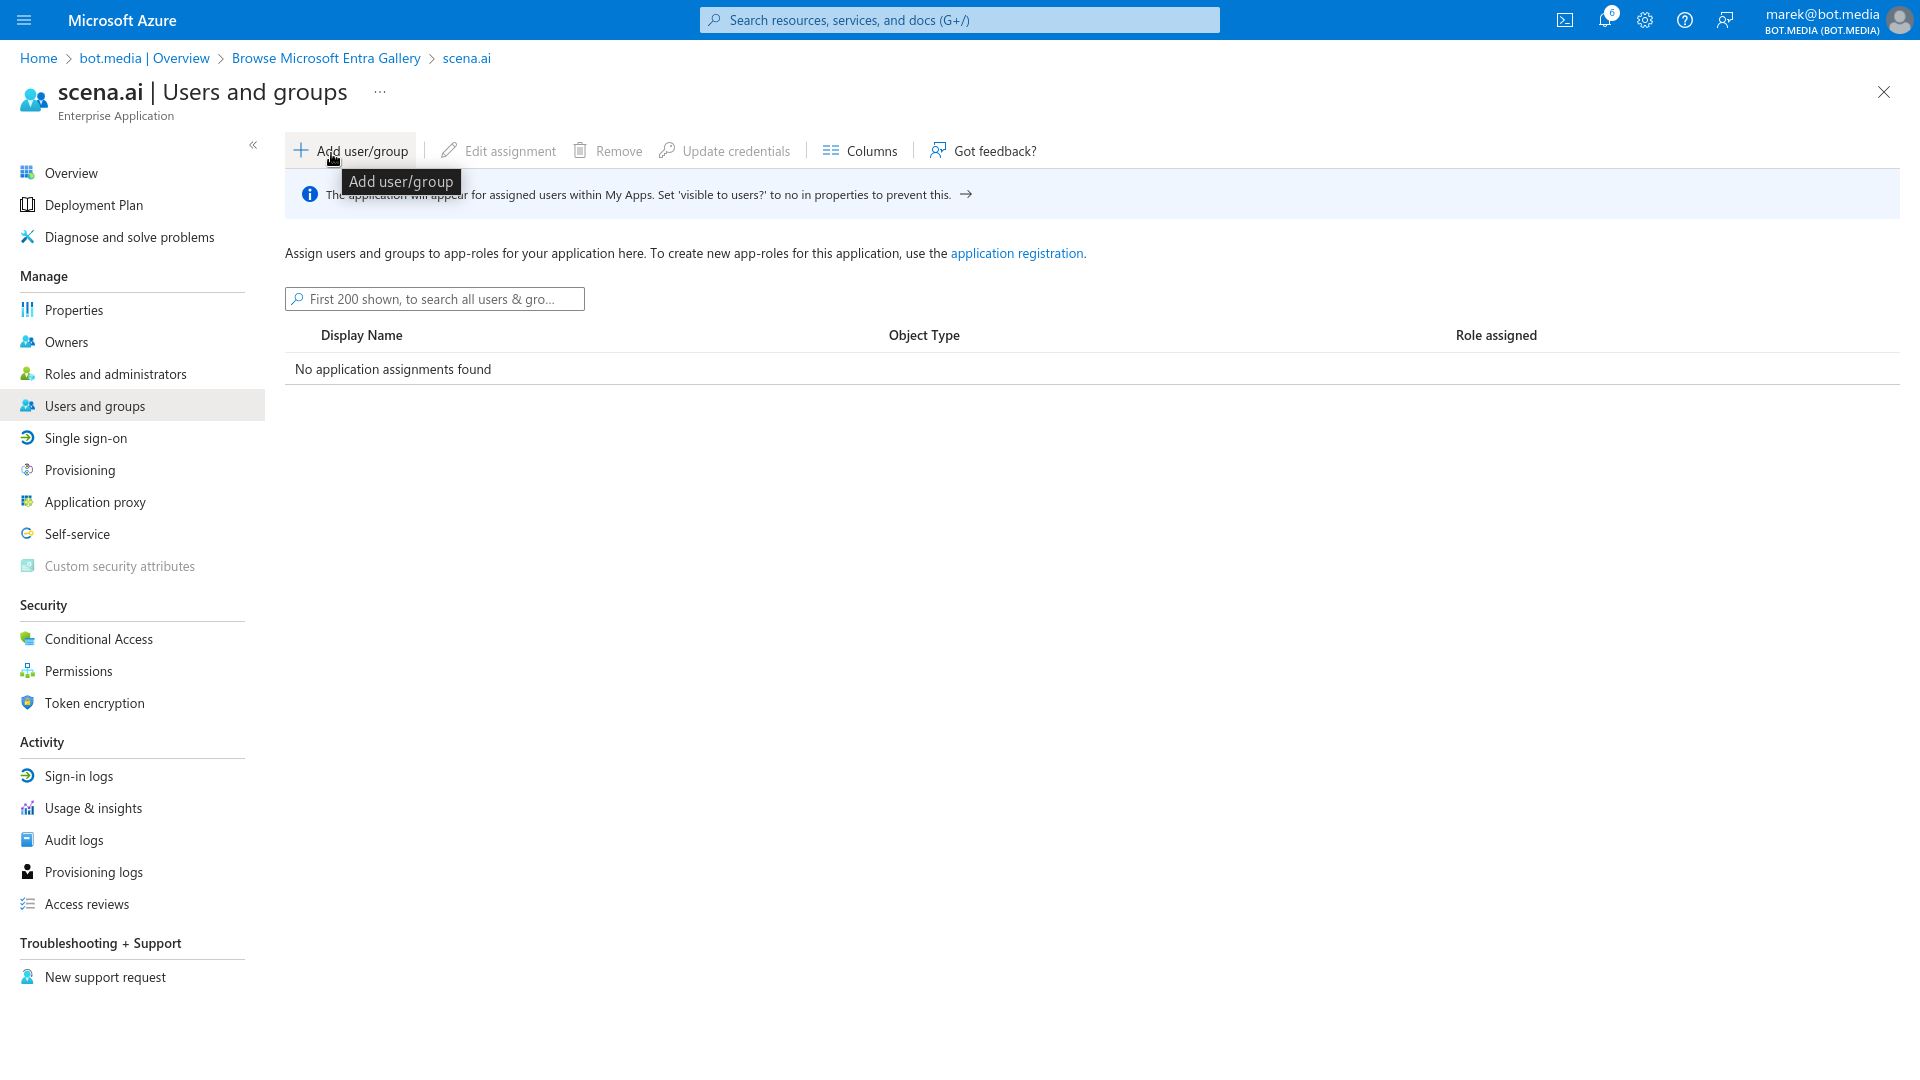
- Configure user permissions in Users and Groups for your organization.
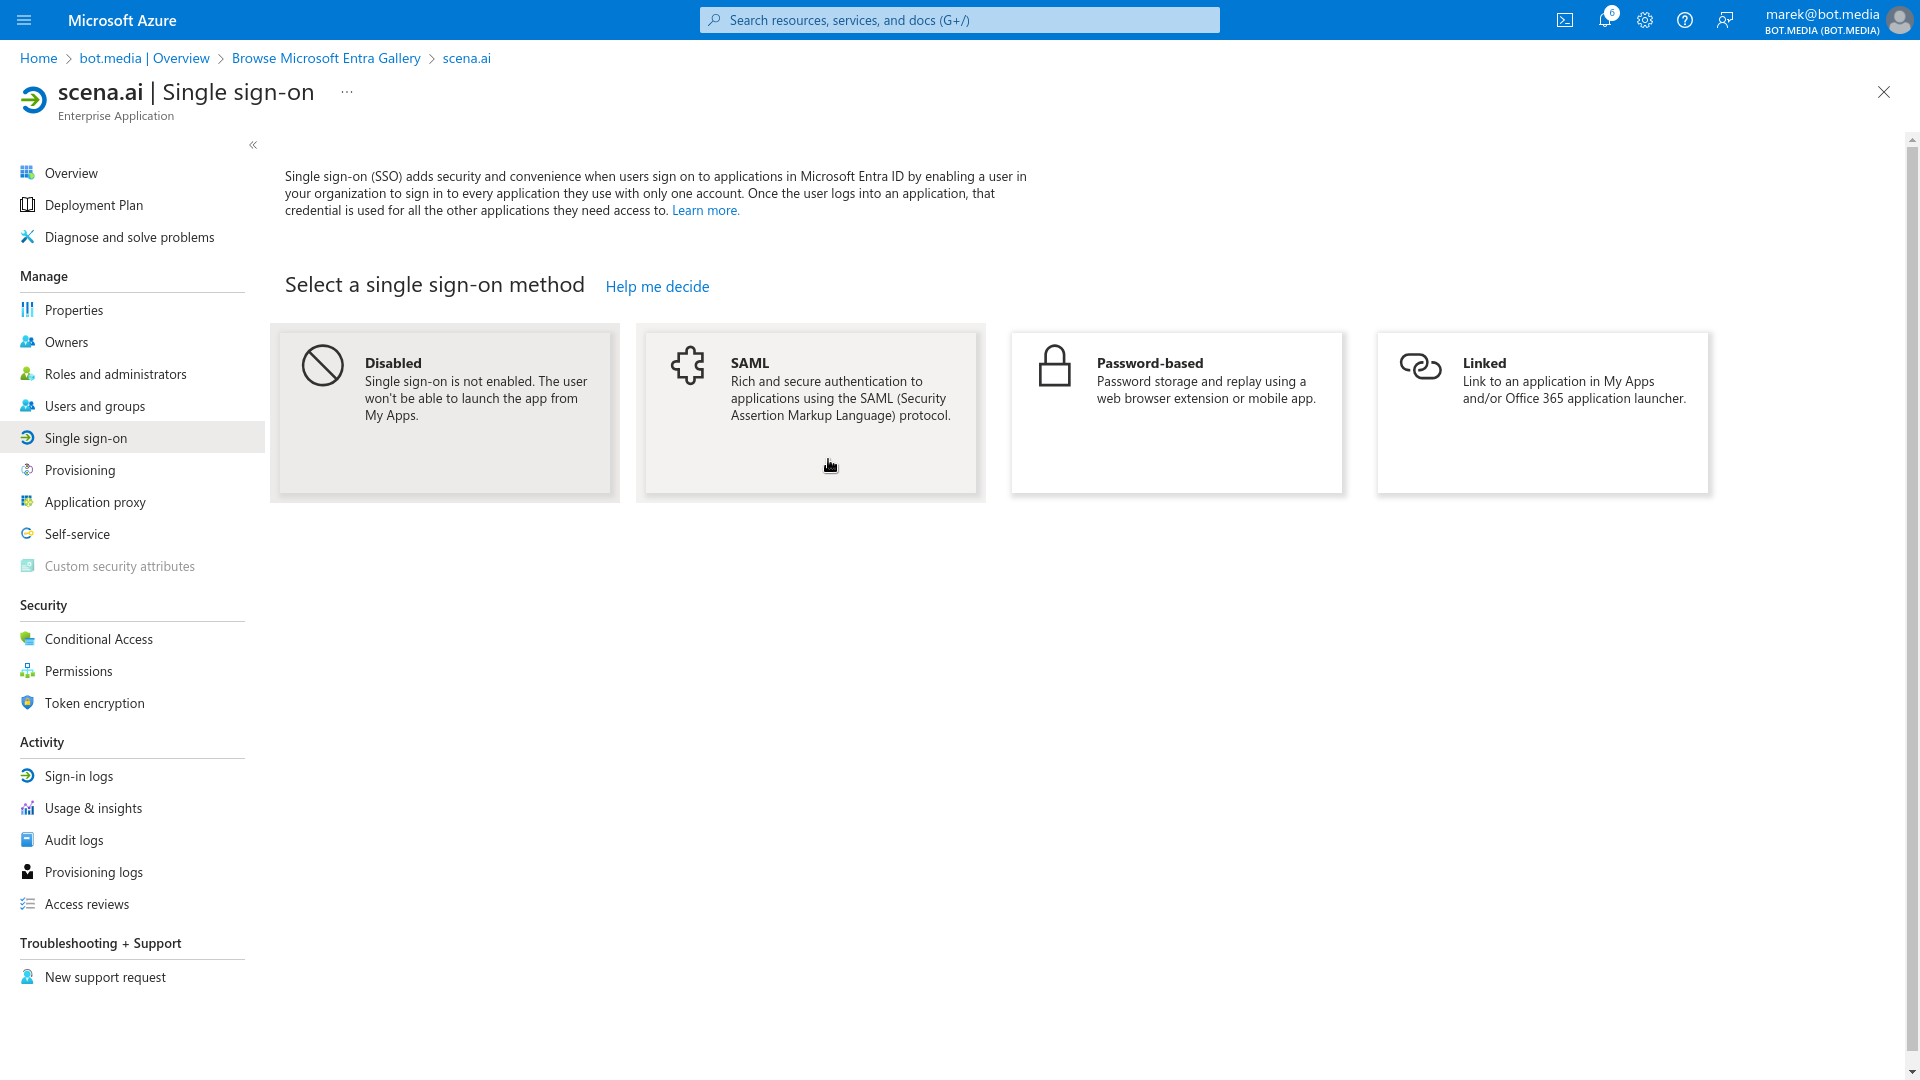
- Choose Single sign-on in menu and choose SAML as sign-on method.
- Edit Basic SAML Configuration and paste the Reply URL from the scena.ai SSO configuration.
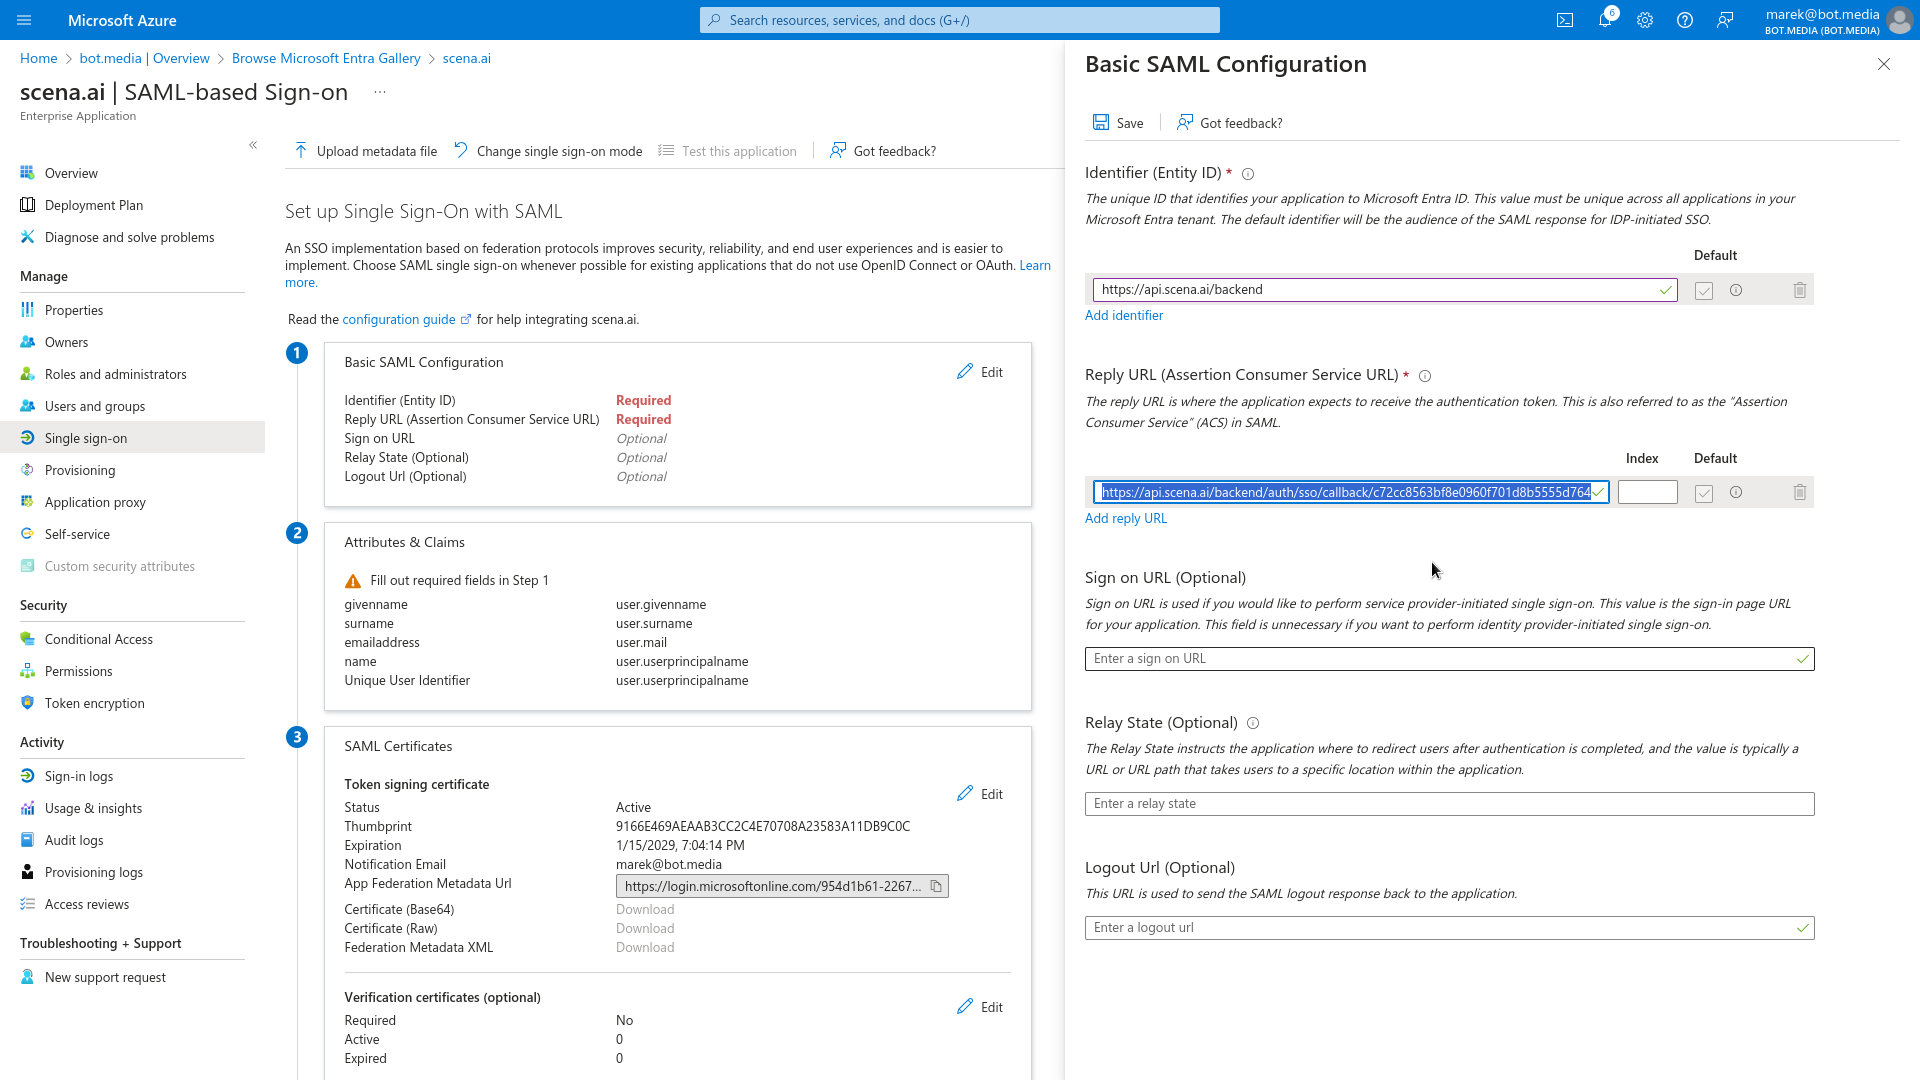
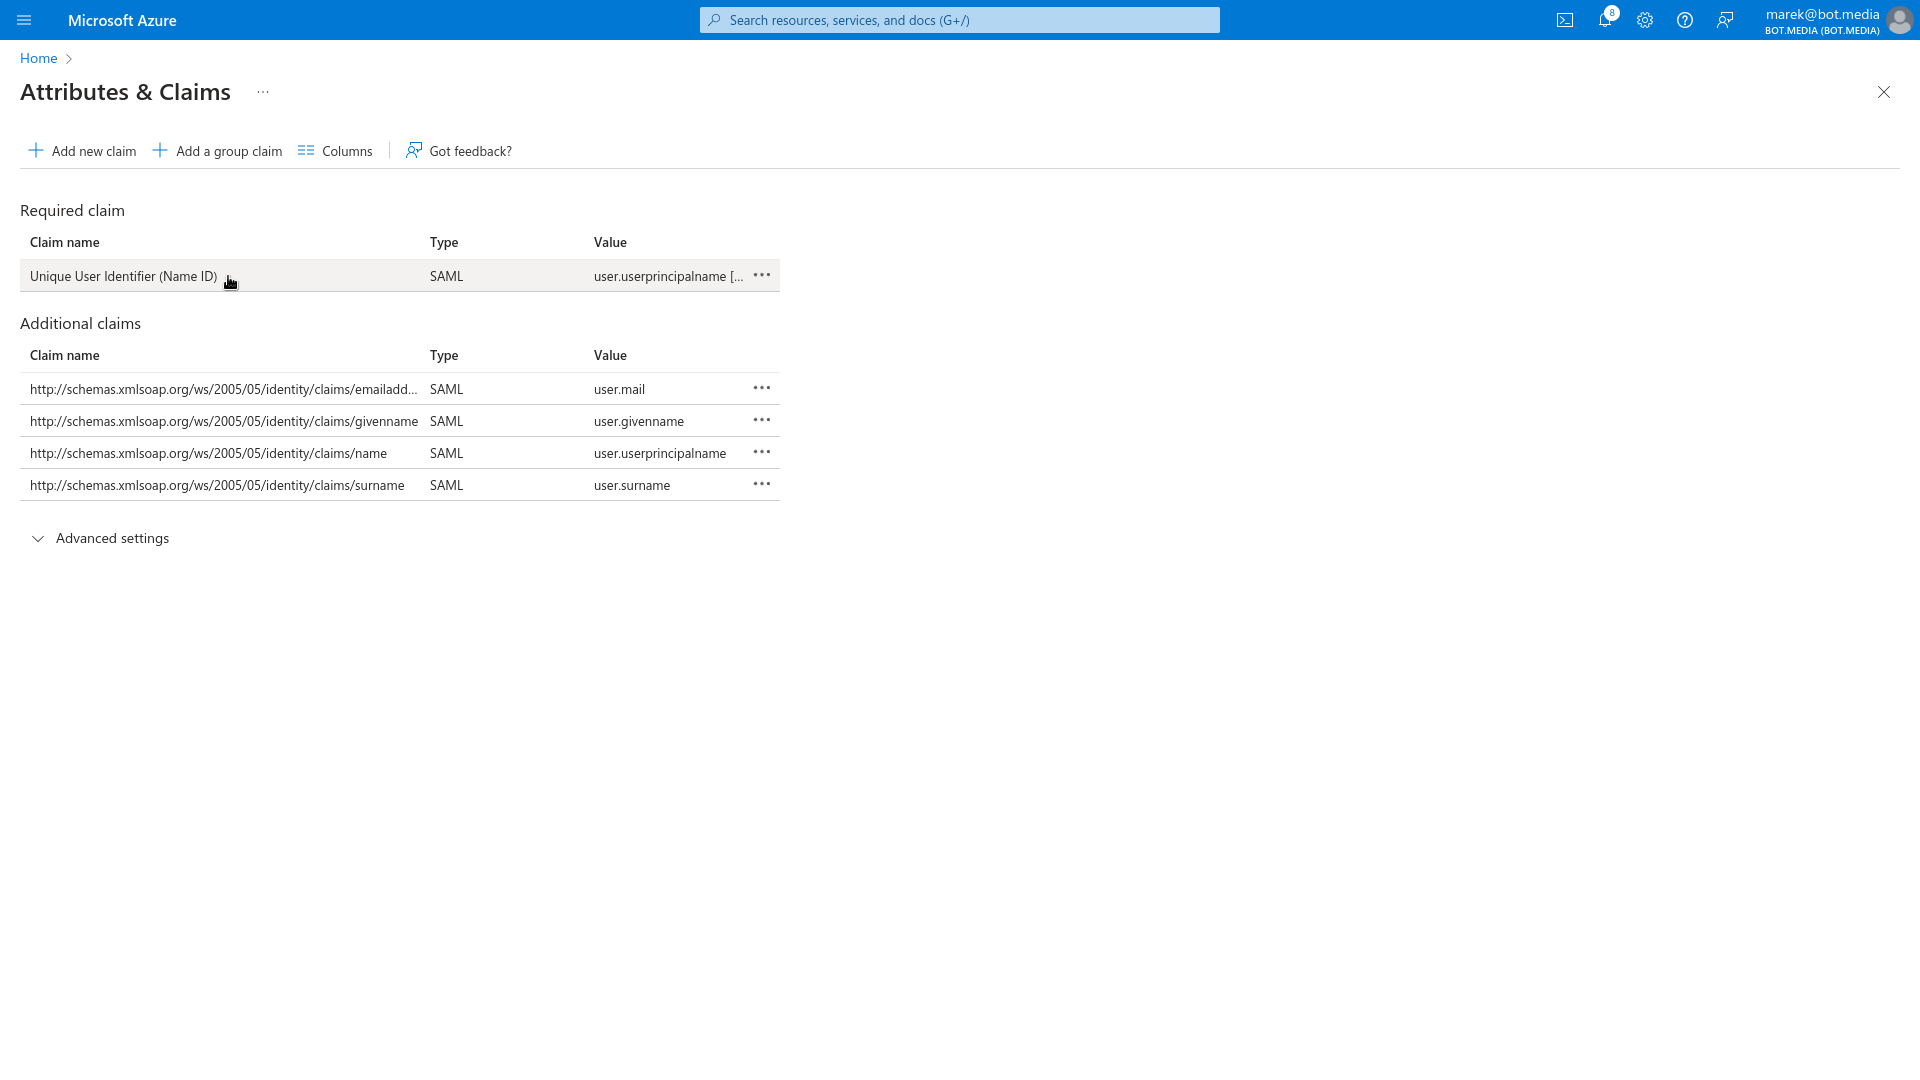
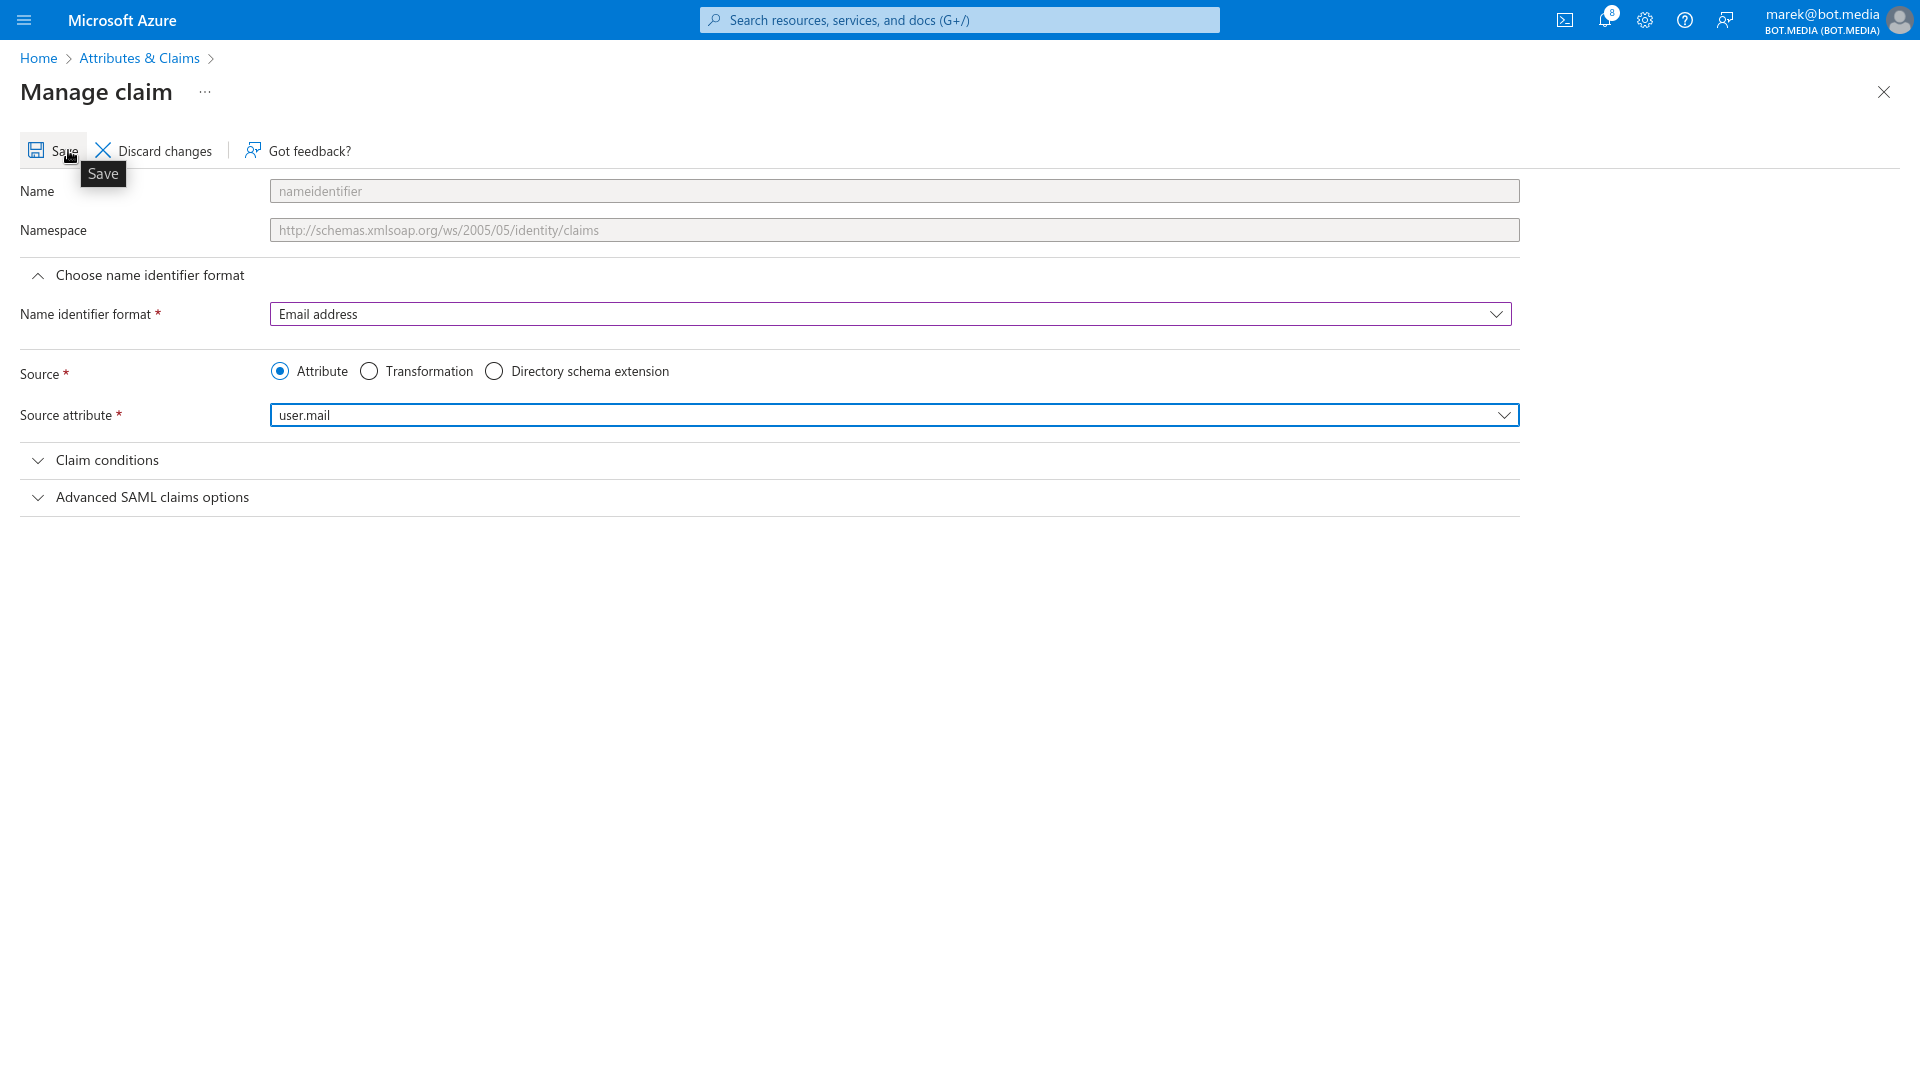
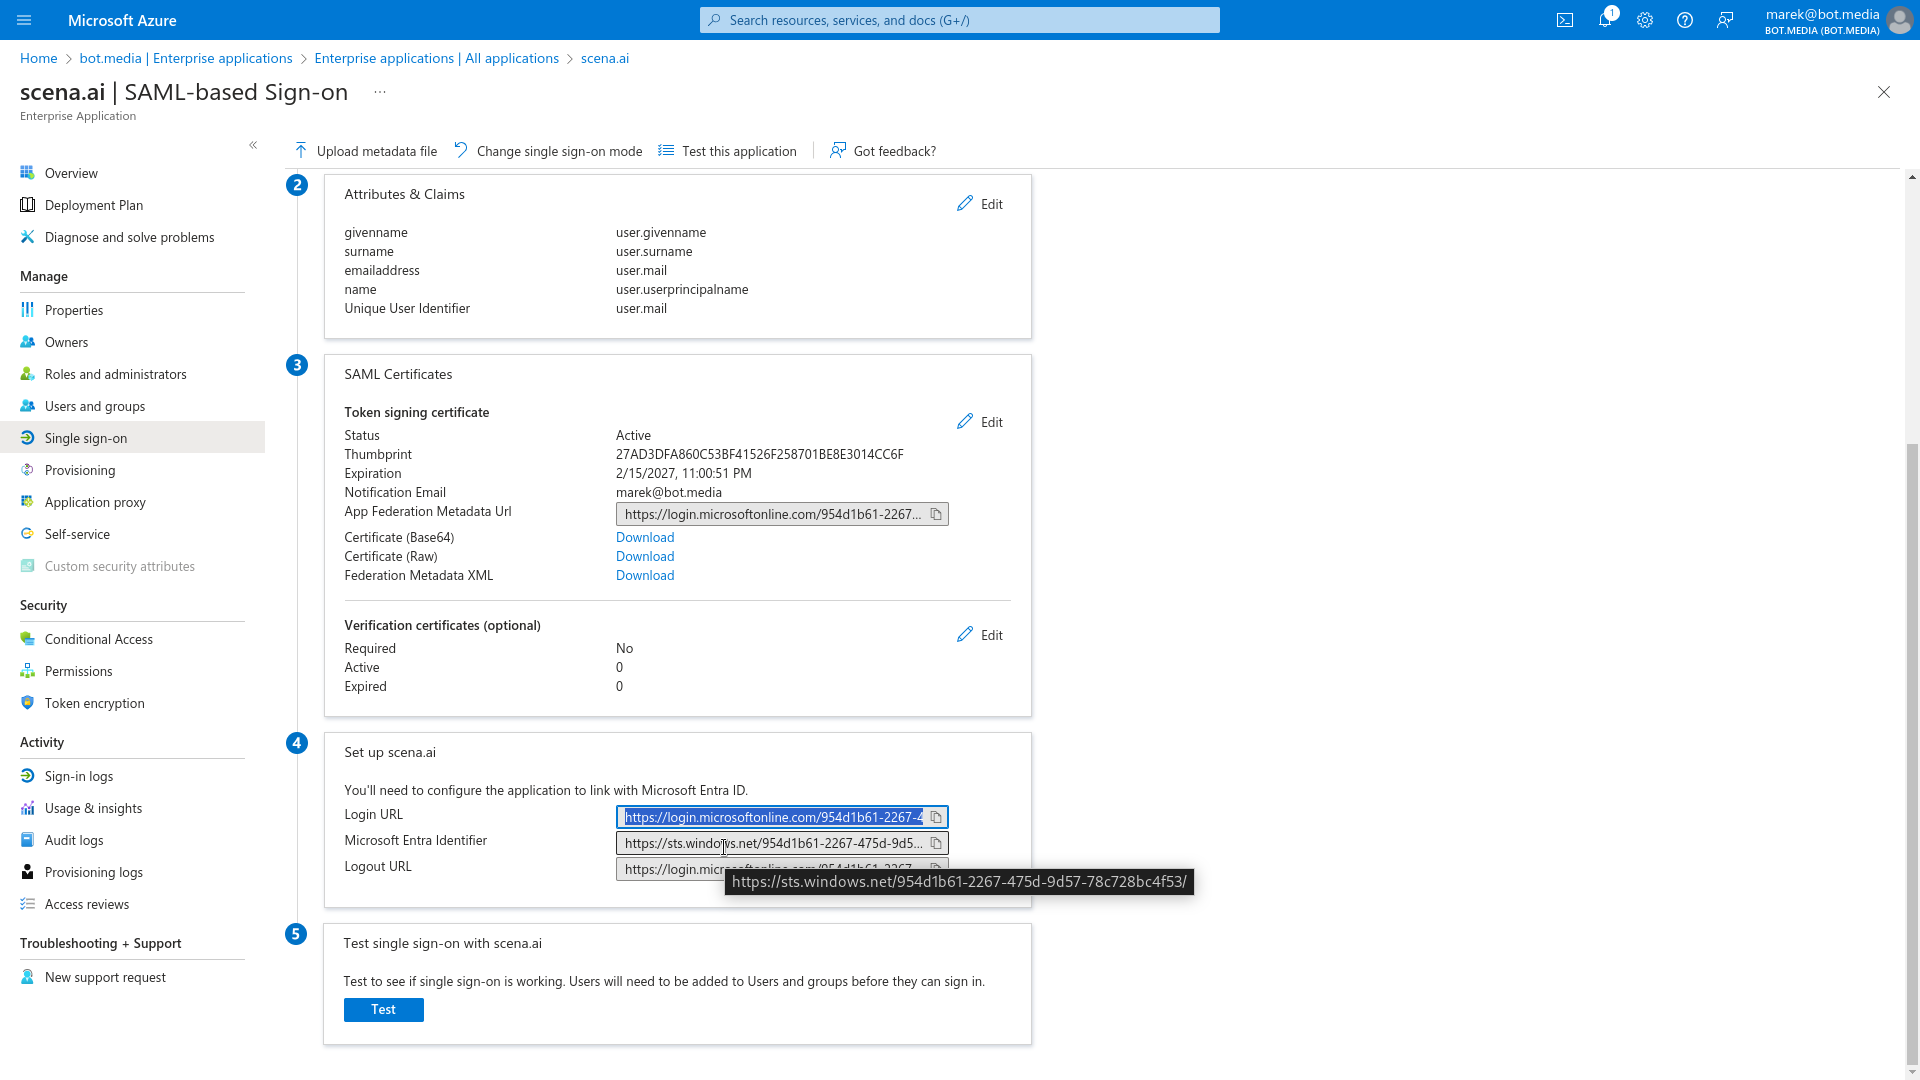
- Edit Attributes & Claims and change the Unique User Identifier to user.mail.
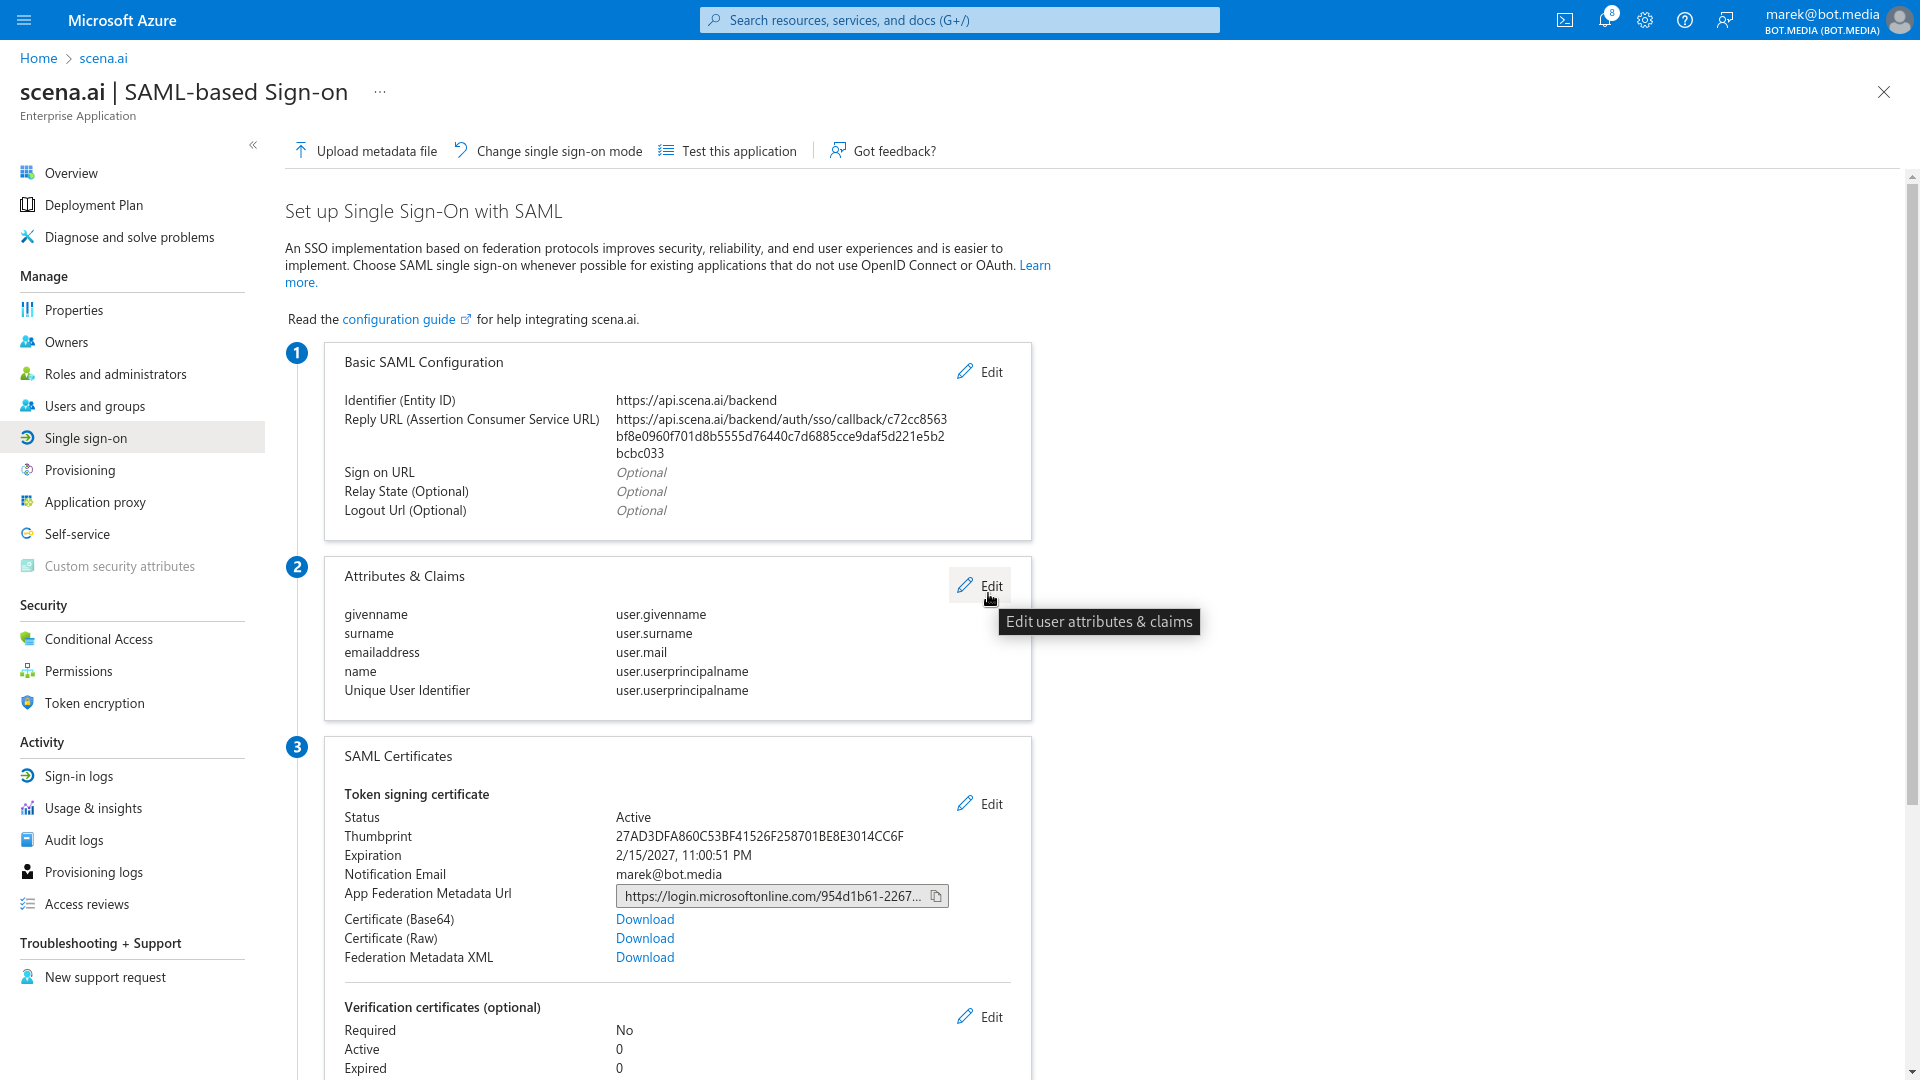
- Copy Login URL, Microsoft Entra Identifier and export Certificate (Base64) into the corresponding fields in scena.ai SSO configuration.
Verify the integration by testing it with the Test button under Microsoft Azure. Upon completion of these steps, your users should be able to log in using Azure SSO at https://app.scena.ai/sso.